Baby Steps

I let projects intimidate me. Sometimes a problem seems too big or a too mentally taxing. I know I can do it. However, my brain shuts down and continuing seems more daunting than a trip to Mordor.  

The cabinets for the trailer have been one of those projects. I’ve been letting it get so much bigger mentally than it needs to be.

  
I decided to buys some base kits and then alter them into what I want. At the time that seemed so much easier than measuring and cutting. And I know ultimately it is easier. 

After getting the pieces dry fit and into place, my brain decided it had had enough for the day. Instead I played with all my bits and bobs for the trailer. When it doubt, play.    

    
 I’ll get back to the cabinets…eventually. I’ve found some pictures to help me narrow in on what I want them to look like, so that will help. 

I have plenty of other little projects to keep me busy until I finally get over this little hurdle. 

Picking Colors…Again

front 6

I mentioned yesterday that we had the outside of the house repainted.  It was actually one of the first things done for the house.  The original color was a beigey peach color with flesh undertones (I can’t figure out why pictures don’t truly capture the color accurately).  OK, it probably wasn’t that bad.  Let’s just say we didn’t like it.  Since we were painting the inside ourselves, we figured that we could splurge and have someone else paint it.  Plus it was July in Florida, were there’s 95 percent humidity at 8a.m. Think of all that mess!

front before

We had to pick colors.  You know how well we do that.  Here are the swatches on the front (this was taken after they had started painting).

exterior colors2

We were leaning towards dark trim, white accents and a lighter base color.  We had browns, blues, blacks, beige, greys, and a really dark brown. What colors would you pick?

exterior colors1

Here are the swatches on the back of the house.  More browns and greys.

exterior colors3

After much debate, painting swatches, painting bigger swatches and standing in the yard squinting at the house using a tree and our hands to try and see the big picture, we chose the above color scheme.  The grey (Ashwood by Benjamin Moore)  is for the body of the house.  The dark color is for the trim and accents (its a color that we custom-mixed to get the perfect bittersweet chocolate color).  And the white is for the eaves and beams.

painting

The painters taped up the all the windows and doors.  The house felt so small with all the windows covered up.  They were covered up for four days, thanks to some rain and me adding more work for the painters.  They thought we wanted everything painted one color.  I had a nice surprise for them when they showed up that first morning.

painting1

Here is the side of the house with the living room windows and bedrooms.  All the windows have panelling under them, so I wanted the paint scheme to accentuate them.  The painters were not expecting the extra work, but were very nice about doing it (of course the extra money we had to pay probably helped).

painting2

This is the back of the house with the dark brown painted, but nothing else.

painting3

house painted1

Here it is, almost done.  You can see the permit board on the right from our kitchen installation and the windows are full of who knows what.

after b

Here’s the back of the house all done.  You can use the shed for comparison, since the house used to be the same color.  It will get a paint job too, eventually.  We have a lot of plans for the back yard, but it will be years in the making.

PicMonkey house1

Here’s a quick before and after.  This is before we painted inside.  The new paint colors let the architecture of the house stand out and it lets the coral on the front be the star.  When we landscape the front the greens of the plants we choose will pop off of the grey background.

after2 b

And here is the front with the new color in the hall.  Our next project will be the landscaping of the front beds.  We also need to find some cushions for the chairs on the porch.  I found those at our closest Habitat Restore for $10 each.  There are two more in the back yard.

If I can get my photoshop to work I’ll put together a little plan of what we are thinking for the landscaping. I don’t want to tear out the old bushes until we have the new ones.  Not because the front will look naked.  Not because I’m trying to streamline the process and do it all in one day. No, it’s because I don’t want to scare away the lizards for too long.  Yes, I’m weird.   Jamie has been very sweet and has not made fun of me for it.

Our Welcome Center

7652d7e6b5a811e1aebc1231381b647a_7


When we first moved in we knew we wanted to paint the big wall – that you can see through the windows – a great color.  This picture was taken just before we had the outside repainted.  You can see the big wall in the front hall that is screaming for some color.  It just wants to stand out.  We waited until after the house was painted to choose a color.

front hall before1

We were stuck between an orange hue and a turquoise/aqua hue.  Ultimately, we decided on Duck Egg by Martha Stewart (surprisingly, not one of the samples we had painted on the wall).  The blue/green wouldn’t be too overwhelming when coming into the house.  And, since we wanted to have the color wrap around into the living room, we figured an orange wall and an orange couch might just be a little too much, you know, orange.

front hall before

This is the only before picture I can find, but it gives you the general idea.  A long, skinny area that opens up into 3 rooms and is lined with floor to ceiling windows.  You might have remembered a small picture of the area as our storage area for the kitchen project.

front hall4

This is the area now.  A bit of an improvement.  As you will notice there is the awesome new color on the big accent wall,  a fun new light fixture, and some new furniture.

front hall9

Isn’t it fun?  It’s a modern light that seems to have been inspired  by the Sputnik light .  Those globes are terrifying to put on.  I was positive that I was going to break one.  We plan on putting up a tongue and groove ceiling to cover the popcorn ceiling… someday.

front hall1

This is the view that welcomes you when you open our front door.  Since the front door doesn’t open all the way (it scrapes against the floor, it’s on the list of things to do), this is exactly what you see when you open the door.

front hall2

To the right is the living room and kitchen.

front hall3

To the left is the hall closet and the office door.  The plaque on the wall belonged to Jamie’s grandmother.  It’s the serenity prayer.  A good reminder when you leave the house.  The slat bench that is sitting in front of the windows is from our favorite Rocket City Retro.

front hall7

It’s probably 7 feet long.  I love it, but I was worried that it would just end up being a place to put on shoes or a catch all, but I have actually seen my daughter reading on it and the boys sit there and play video games.  Yay!

front hall8

But I can see why they like it.  It’s such a great view of our neighborhood.

front hall5

The bookcase was a $10 find from Goodwill.  It might have been one of those times that I saw it, grabbed it and dragged it around with me so no one else would buy it.  The painting above it is also from Rocket City Retro. We love the bright yellow against the aqua. It’s so yummy.  The bookcase is home to one of my Christmas presents (the awesome blue vase on the top), some of my favorite little paintings (including a picture my sister drew of The Jetsons), and a few pictures from our travels.

front hall6

And on the top is our bowl of love.  It holds all the different heart shaped stones and shells that we have found (including one from Mount Saint Helen’s).  We have found them on the beach and on our travels.  It’s a fun reminder that love is all around us.   You just have to keep your eyes open and you are bound to find it.

That’s our front hall!  We’re pretty happy with how it’s coming along.  Maybe a rug, maybe a little more art on the big wall, but those things can come over time.

There are still some things to do, but they are back burner projects.

Here’s our to do list:

  • refinish front doors (so they are less dry looking and they doors open all the way)
  • replace closet doors (the 6 panel doors are not quite appropriate for our home’s architecture)
  • replace the door knobs on the office door
  • replace the light switches (I’m just not a fan of the big flat switches- I guess they come in handy if you need to turn on the lights with your elbow)
  • replace the one ivory colored outlet with a white one
  • install tongue and groove ceiling


Sunflowers

I love thrifting.  It is one of my favorite hobbies.  Some days are good, some are bad.  It’s a great way to find unique items, things that I’ve been looking for, or even unexpected treasures.  It’s the thrill of the hunt.  Keeping your eyes pealed for a hidden gem.  Basically it’s the ultimate Legends of the Hidden game.  My mom has been in town for the past few months.  She is the ultimate thrifter.  She will call up every couple of weeks needing her bargain hunting fix.  This past Wednesday was a good day.

59f0cdd865a211e2bb0f22000a1fbc94_7

I found a pair of lamps for my bedroom ($25), a Viking glass vase (at least that’s what I think it is, either way I love it- $4.50), and a pretty long crewel embroidery of sunflowers ($2).  I found a few other things that will be put on Etsy.  My mom and I resell things that we find that are too amazing to pass up, but we don’t have room for in our own houses.

sunflowers1

Sunflowers have a special place in my heart.  When Jamie and I were dating he wrote me a poem about sunflowers.  It was really sweet and it doesn’t hurt that I love sunflowers too.  So when I saw this piece of fiber art I knew I had to have it.  It just needed a way to hang it.  I looked into stretcher bars for artists to use to create canvases.  It would have cost about $15 to order what I needed, but I was feeling cheap so I decided to make my own.

sunflowers2

We have a pile of left over lumber from the kitchen.  After looking through the pieces I figured I had enough to make the long sides, but nothing really to use to make the short sides.

sunflowers3

Then I noticed the leftover giant stir sticks we had gotten from Home Depot when we bought our 5 gallon buckets of paint for the house.  They were perfect.  I cut the wood to the lengths that I needed,  used wood glue and tiny little brad type nails to create a basic rectangle and let it dry over night.  Sorry, I forgot to take a picture of the frame before I started stapling it all together.

sunflowers4

Using my staple gun, I stapled the short sides first.  Then, went back and did the long sides.  I didn’t put tons of staples in.  No one would be siting on it, so I only used enough staples to hold it taught.  The corners were folded quickly and stapled down.

sunflowers5

Jamie suggested hanging it in the front hall so that it would pop against the blue.  The rest of the house is our Groovy Grey color and it just seems to disappear on those walls.  I love it.  I’ve been wanting some sort of fiber art and am thrilled that I found this one.  The great part is, if we ever find something we love more, we only have a $2 investment into this one.  Isn’t thrifting awesome?

sunflowers6

Here it is from the front porch.  I’ll have to take pictures of the rest of the front hall.  As you can tell we picked out a color.  I’d call it “almost done”.  There are a few things small that I would like to change, but those are total back burner projects (they can wait until other bigger projects, like picking colors for the stereo room and our bedroom or refinishing our front doors, are done).

So, there you have it, our $2 piece of art that is totally awesome!

The Kitchen Finale

It’s done!  Technically it’s been done for quite a few weeks, again I’ve just let life get in the way of posting the finished pictures.

I can’t believe we lived in the house during all the construction.  I guess I’m really good at suppressing memories.  Towards the end, I was sure the guy who made our cabinet doors was going to quit because of all the nit picky things I would hit him with first thing every morning.  I’m sure our contractor talked him off the ledge a few times.

kitchendone

I love our decision to not have upper cabinets on the wall with the range.  I never realized how claustrophobic they made me.  Cooking feels so open and airy now, I love it!

I used to think under cabinet lighting was a waste of money, but now I don’t think I could live without it.  It’s like curtains on a window or a well placed rug.  It just adds that something to make the room feel warm and loved.  I love it too.

The microwave under the counter is awesome.  It took me a few times to figure out how to use it, since I don’t read directions on power tools and appliances.  The placement is great.  Out of the way of the person at the stove, convenient for the kids (when they are old enough to use it), and not a feature of the kitchen. Ok, I love it too.

kitchen done 2

I love the wood.  I love the countertops.  I love the pop of green.  I love our fridge.  I love the storage.  I could go on and on, but I’ll stop.

kitchen done 3

There are things that I don’t like or would have done differently.  The main thing that bothers me is something that can’t be helped.  Due to code restrictions we have to have 8 electrical outlets on the countertop alone.  I think I counted 15 outlets total in the kitchen that are either new or moved.  Overkill.  However, I’m sure I will like it if I ever decide to use every single appliance that I own, plus a few power tools and a glue gun all at the same time.

The only other thing I would change is to add recessed lights by the refrigerator.  It can look a little dark over there now that we have the beautiful lighting on the other side of the room.

I created a short video of the the kitchen’s progress over the 3.5 months that it was being worked on.  Enjoy!

The Kitchen from morgenflower on Vimeo.

Getting Somewhere

So, it’s been a while.  Life gets busy this time of year.  We can all relate to that.

I think we last left off in the office.  Here’s a reminder where we started off…

Office2

We painted it Retro Avocado.  Since then we have added a few things that are really making the room come alive.  I’m only going to show you one side of the room today, since well, I’m too lazy to clean the other side of the room.

curtains

First, you might notice the amazing blue carpet.  It was a $25 Goodwill find.  In a way, it’s Oscar’s little brother.  We are calling him Zoot, after the saxophone player in Electric Mayhem.  It’s a 9×7′ shag rug made up of blue and green yarn.  The couch is an amazing find that we picked up at Rocket City Retro.  Since the color of the couch and wall color are pretty close to being the same, we knew we needed something to break up all the green.

Etsy to the rescue.

curtain4We found this wonderful MCM curtain and thought that it just might do the trick.  The only problem was that there was only one curtain panel.  According to the seller it was 78″ long and 64″ wide along the bottom.  We took a chance and bought it.  I took out the pinch pleats so that it would be a big rectangle.  I took out the top hem.  That added an extra 3 inches.  Then, since I don’t trust my ability to cut a straight line, I took it to a tailor to have it cut in half and hemmed.

curtains2

They turned out perfectly!  Now, we can’t close them for privacy since they aren’t wide enough, but we can always add plain white or yellow panels to the rod if we decide we ever want privacy.  Since it’s just an office, privacy isn’t really big concern.  I personally love how the greens from outside just blend right in with the greens on the inside.

We ordered the pillow from Urban Outfitters.  It was the perfect yellow color.

curtains3

The other side of the room looks awesome.  You will just have to take my word for it until I get off my lazy, I don’t want to do anything because it’s Christmas time butt (not to be confused with my lazy, I don’t want to do anything because it’s thanksgiving butt) and clean it up so I can get some pictures.

Overall we are loving all of the color.  So much happier.

Learning New Tricks

This past week we painted the office.  We went with Retro Avocado by Behr.  The color was kind of chosen for us because of Oscar the Rug.  We were going to use it as our accent color in the living room.  We bought a gallon of it and were ready to paint.  Then fate intervened when I found Oscar.  Since Oscar is very close to the Retro Avocado, we decided to use the paint somewhere else.  The office was the lucky winner, it’s a great color.

It looks much brighter in our office.

When we paint, we divide and conquer.  Jamie rolls and I do the brush work (because is Messy Marvin, he’s been known to get paint on stuff when not painting).  The other colors we have used in the house (Groovy Grey and Glass of Milk) have covered with one, maybe a light second coat.  Retro Avocado on the other hand is pure color and required three coats of paint.  So much fun when you are cutting in a textured wall that meets a textured ceiling.  I usually paint the trim first, then cut in the wall color, and then follow up with the touch ups (I always have touch ups).

With the wall being very green and the trim being very white I knew any little imperfections would be noticeable (mostly to me).    Past experiences with our textured walls of trying to tape the trim and cutting in the wall color usually makes for lots and lots of touch ups.  I knew that technique wouldn’t work.   I got creative,  it worked and I thought I would share it with you (if you haven’t already thought of it or seen it somewhere else- I haven’t seen it anywhere, but I also haven’t looked either).  I started with this method of painting crisp stripes on a wall and adapted it for painting trim.

First I painted the trim, waited for it to dry.  I taped off the trim with blue painters tape.

Next, I went around the room and painted a quick coat of trim paint on top of the paint to seal the edge of the tape against the wall.  I waited for it to dry thoroughly.

After it was dry it I painted the three coats of the wall color and let them dry (I didn’t want the wet paint on the tape to mar my trim).  Jamie removed the tape by going very, very slowly.  We just wanted to make sure it didn’t pul up any paint with it.

And behold, it worked beautifully!  It was a lot of work, but with how many laps around the room we had to do it was totally worth it to not have to do touch ups.

We will be back with full room shots of the office.  It has started taking shape.  I love it when an idea works.  You end up feeling like a superhero for the rest of the day.


Adventures in Lighting, Part 2

A quick recap of our last post:  we bought a spray painted sputnik light, had it sandblasted, had the stem lengthened, hand oil stains, we ended up spray painting it.  Well, that took a lot less words than the last post.

Our adventure continued when we wanted to actually hang the light in our dining room.  See, we have these lovely vaulted ceilings with beams, which means that there isn’t an attic or crawl space to go up into when we want to hang a light.  Lucky for us there are already wires sticking out close to where we want the light to be.  Yes, lucky for us.  And this is where the “old houses are harder” lesson continues.

Since we don’t tend to be very handy and prefer to keep all of our digits, we asked our contractor to create a box for the light to hang from.  We are difficult and wanted it to hang between the beams, so they had to create a faux mid-beam beam.  Jamie suggested, before we get the whole thing hung, that maybe we should test the wires and make sure they work.  They didn’t.  Our contractor thought they were almost original to the house, so it’s probably for the best that they didn’t work.

So, now we have a hole in our freshly painted wall, light sockets hanging out of the wall, and a half finished box on the ceiling.

Turns out there wasn’t anything wrong with the wires.  Previous owners were at fault.  Some where along the line, someone put in a 4-way switch and wired it wrong.  After the electrician got it all straightened out, he lengthened the wire, put a hidden junction box in the wall and reinstalled the right type of switch. Maybe it isn’t that old houses are harder, it’s hire a professional to do the wiring.

The painter came later and patched the hole and repainted it for us.  That made me ecstatic, since we had painted that very spot a little less than a week ago.  He covered the wires, painted the new beam-box, and patched the small part of popcorn ceiling that came down when they were uncovering the wires.  We have plans for that popcorn.  Eventually it will be gone.

The light is up now.  It’s beautiful and makes the dining room inviting.  Before it was kind of looking like a table sitting in a walk through area.

Since I waited so long to finally post this the fun star bulbs we ordered came in.  Behold our finished sputnick:


Now for some beauty shots:

Ooohhhh…..

Ahhhh…..

Let’s get a closer look at those light bulbs…

Just in case you can’t tell, we are very excited about our new light, or is it lights.  Either way, it’s awesome.


Adventures in Lighting, Part 1

You would think after spending seven months waiting for this house, three months in this house and hearing “there’s a problem” from our contractor countless times that we would eventually learn nothing is easy or simple when it comes to an old house.

Let me start at the beginning.  Before we even had the keys in our hands we knew we wanted a sputnik chandelier for over the dining room table.  We watched them on ebay sell for way more than we were willing to spend, but we had hope that one day we would get one.  We mentioned to our friends at Rocket City Retro to keep an eye out for one for us.  Turns out they had one in their back room.  Only problem was that someone had painted it silver and the paint was flaking off.  It was ours if we wanted another project.  So, we bought it with the hopes that we would be able to have it restored to it’s original brassy beauty.

We had it sandblasted to get the paint of of it.  That left it a sparkly champagne color and actually kind of pretty.

We took it to a lighting store to see about having the sockets removed so that we could have it powder coated to be shiney again.  Turns out that with 24 arms that would require a lot of work and subsequently a lot of money.  We decided to leave it the sandblasted color which was slowly growing on us.  We asked the lighting guys to extend the stem and skipped on our merry way.  Ok, it was more like drove away in a hot car with a cranky three-year-old.

After about two weeks we got the sputnik back and new problems surfaced, or there were new problems on the surface.  Turns out the lighting guys didn’t wear gloves when they were working on the light, so the oil from their hands created dark brown/black spots on the sandblasted brass (bad blogger Morgen didn’t get pictures of that part of the process- looking at it made me sad).  I decided it wasn’t worth the money to have it re-sandblasted (I’m cheap like that).  So, I tried cleaning it.  First with 409 (fail), then with steal wool.  The steal wool probably would have worked if I had tiny hands and a week of free time.  So, I did the unthinkable, I spray painted it again.  Rustoleum makes a spray paint that is very close to the color of the sandblasted brass, Champagne Mist.

I was planning on spray painting the stem of the light anyway since it didn’t match the light.  I misted it just enough on the sputnik to cover the oil marks and trying to keep the sparkle of the sandblasted brass.  I then used a clear coat in matte to seal it and hopefully prevent any future oil marks.  Unfortunately, it lost a little of it’s sparkle, but the sparkle was very subtle.  And if I ever want it back I can cough up the $30 and have it sandblasted again.  Only this time we will make sure to seal it right away and stop oil marks before they can happen.

This post turned out way longer than I thought it would, so it will be continued with a part 2 where you will learn why things are never simple with old houses, and hopefully a final post when it’s hung up.

It’s different.  It’s unique.  And hopefully when it’s hung it will look amazing.  Check back soon for part 2.

Oscar the Rug

A hunt for a living room rug has been going since before we moved into the house.  We knew we wanted something that was comfy for our toes and felt right for the time period of the house.  Our first color choice was green, the same green that is in the rocking chair, Terry.  We searched Overstock, RugsUSA, Home Depot, Urban Outfitters, Ebay, Etsy, you name it.  We found a lot of rugs that we thought looked right, but we didn’t want to spend $400- plus on a rug that would take a beating from 3 kids and a dog.

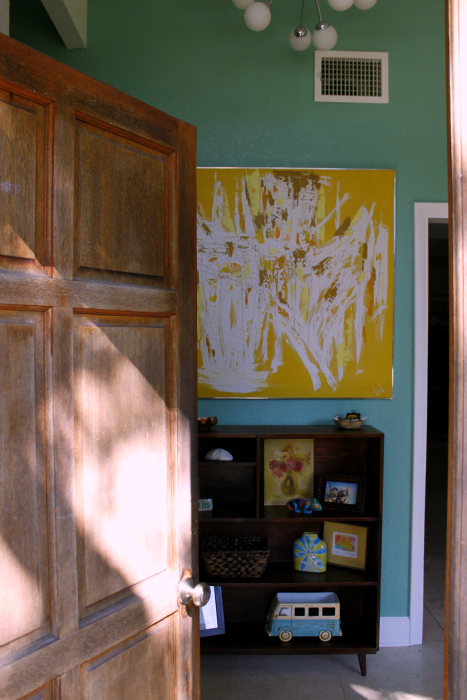
We found a rug on Ebay that we fell in love with and thought it would work perfectly with the room.  Thanks to the “make-an-offer” option, it was a steal.

The orange is not quite right, but we were hoping that it would compliment the couch and that it would be OK.  We were wrong.  It just didn’t work. So, back to the drawing board.  This rug found a home in a different room (more on that later).

On Tuesday, after getting completely frustrated with finding a cheap rug, in the right color, with the right amount of vintage vibe, we broke down and ordered an area rug from Home Depot.  It was something cheap, neutral, slightly shag like and would be here sometime in the next few weeks.

Mmmmm, beige.

Well, sometimes life likes to mess with you.  After you give up and settle for something, you suddenly stumble across what you’ve been looking for all along.  Or at least that’s what happened today.  I had an hour to kill after visiting Home Depot for our bi-weekly trip before I had to pick Ben up from preschool.  Oh, my, what’s a thrifter to do with an hour of alone time?  The toughest decision I had was which thrift store to hit.  Goodwill won since I hadn’t been there in forever.

I always start a thrifting trip the same way.  I start in dishes and cups, work my way through the holiday decorations, move on to baskets and wood items, then through pictures, linens and bedding, and I finish with the furniture.  Today, waiting at the end of the thrifting rainbow, was a pair of old shag rugs.  I may or may not have run to them when I saw them.  One was green (10’x10′) and the other was blue and green (7’x10′).  They both looked hand hooked and in great shape.  And at $60 for the pair, there was no doubt they would be coming home with me.

I tried my darnedest to get them into my cart, but the cart was too small.  I was petrified that if I left them, someone else stronger would nab them both.  So I took the price tags off of both of them and took off for the registers, still petrified that someone else would get them.  I think all the employees there thought I was crazy.  I know I stumped the guys who loaded them into the car for me.  They were surprised by my age.  They thought only people in their 60’s would be interested in such amazing rugs.  Ok, so they didn’t say that last part, but they are amazing rugs.

Oscar’s first photo in our home (via Instagram)

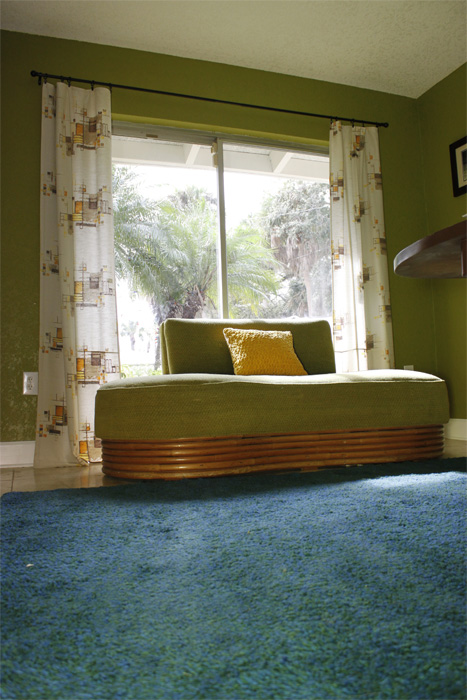
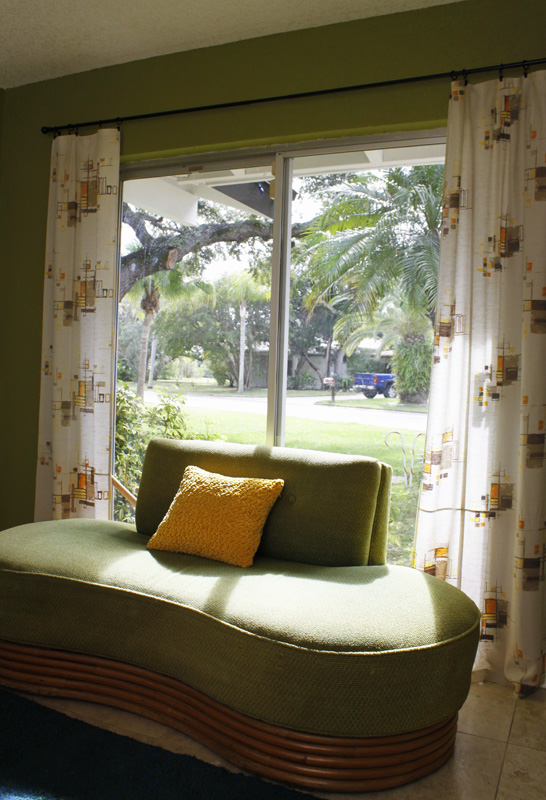
I’ve named the green one Oscar.  He looks great in the living room.  Just the right size, color and price.  I may or may not have jumped up and down a few times since getting them home.  I may have punched Jamie out of excitement too, but I don’t remember.

It is so thick and soft, I love it!  All we need now is some anti-slip stuff to put under the rug (it is very slippy) and a cool coffee table.

We have several places where the blue and green rug will work well. Now, it’s off to the adventure of finding out exactly where it will live.  Thankfully it’s light and easy to move.

Oh, about 3 hours after I got these rugs home, Home Depot called.  The rug we ordered is in.  Oops, I guess I’m going to have to return it when I pick it up.