About a month ago, before we knew we had the house for sure, we decided to start buying furniture. When we moved from Virginia we sold everything except our mattresses and a couch to make the move to Florida easier and cheaper. We found a mid century bedroom set at a local antique emporium that was marked $400 with 50% off. We offered them $150, which isn’t too shabby for 6 pieces. It included a long dresser, a mirror, a tall boy dresser, a queen headboard, and 2 night stands.
Here’s the story of the tall boy dresser.
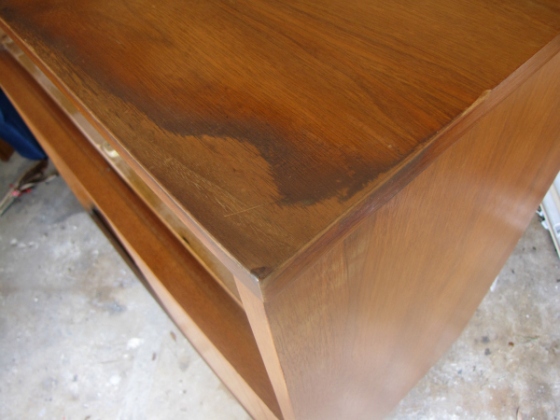
There are 2 large drawers on the top and six small drawers on the bottom (3 are hidden behind the sliding door). But there were some issues with it. There was a build up of dirt or cleaning materials (not sure which) on the corners of the top.
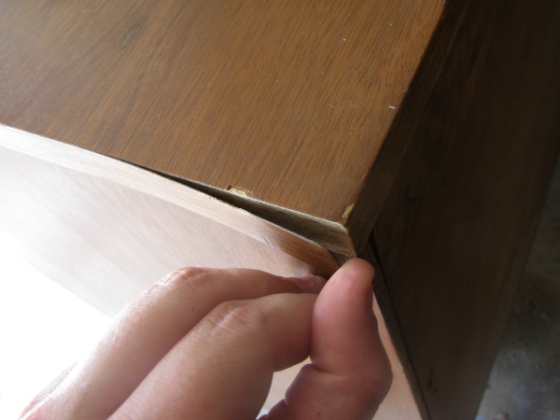
There was a piece of venire coming off along the edge of the top.
There was a big chip/chunk taken out of the top in the other back corner.
Since most of the issues were with the top of the dresser I decided to repair them and then paint it a high gloss black. I didn’t feel too bad painting this piece, since it isn’t solid wood and I was just painting part of it. To balance the black on the top I decided that the door needed to be black too. It would add a graphic element to the piece, and since it was going in my son’s room it would be easier to clean off if it was high gloss paint.
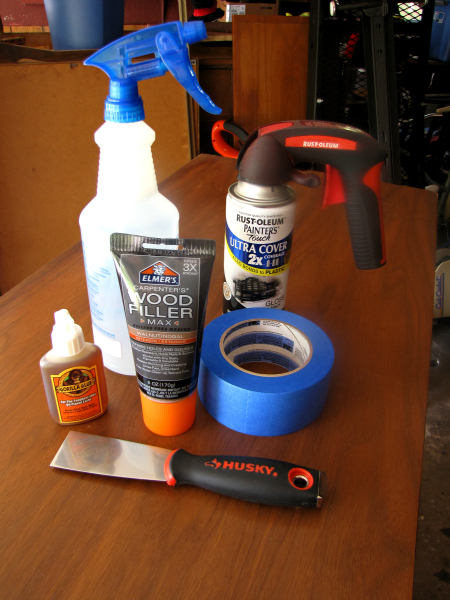
So armed with my tools of choice, I went to work.
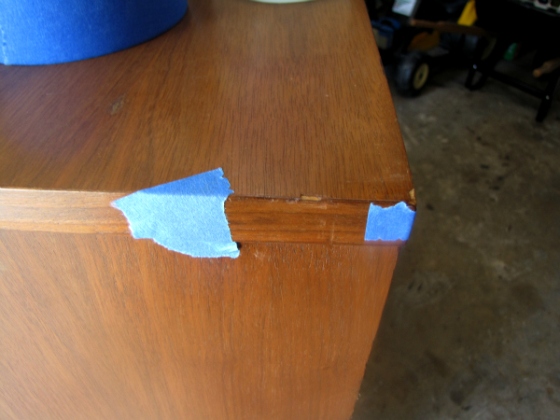
I used the Gorilla Glue to repair the pealing venire. Just got both sides of the piece to be repaired wet and applied a very small amount of the glue. I used painters tape to hold it in place while it was drying. I had to keep a close eye on it to make sure the glue didn’t expand out past the area being glued. I would just wipe it away when ever I saw it doing that.
I patched the other corner and any other small chips in the venire with paintable wood putty and sanded it smooth when it was dry. I could have been more patient with this part, but patience is not something I have when doing projects, so it didn’t turn out perfect (but that’s ok, I was paining it anyway). I used the putty knife to gently clean the build up off the front corners. And when it was all done and the glue was dry I sanded the whole top to create a good surface for the paint to adhere to.
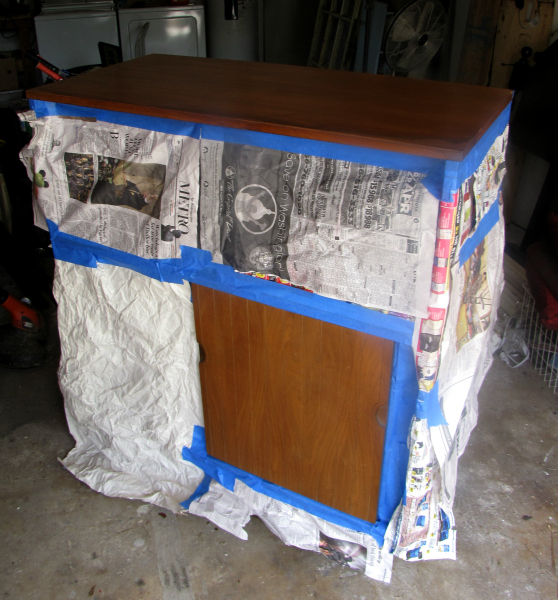
Next came taping off the areas that were not going to be painted.
Using my Rustoleum high gloss black spray paint, I gave the top and door several light coats. I let it dry a little between coats to prevent runs or puddles of paint. It’s hard to tell, but the door has vertical groves in it like pin striping. It made it a little trickier to get the paint in those lines without getting runs. Brushing the paint on might have been a better choice, but I wanted to use what I already had.
When the top and door were done and I removed all the tape, I felt like it was missing something. The top and door looked great, but it just needed something else. I forgot to take a picture of the piece at this point. I was lost in thought. Then it hit me. Paint the knobs too. So I pulled all the knobs off and painted them black too.
I was very happy with the final result after washing out all the drawers (they were lined with paper and LOTS of baby power), putting the knobs back on and getting the drawers back in. It looks so dapper.
I keep wondering if I should have painted the legs too. I don’t have any plans to go back and paint them, but maybe one day if I run out of projects. I really like the way it turned out and plan on doing the rest of the set like this (except the mirror and headboard- those are going in my daughters room and will be painted bright girly colors).
I’ll post pictures of the room when it is pulled together more. We still have to paint, get shelves, closet doors, a rug, etc., the list goes on and on. This was a fun quick project (took a 3-4 hours including drying time and a trip to the hardware store to get more paint) and it will look great in the mid century Star Wars room.

